Week 4: Deep Dive

I set out to add functional software components to the ESP8266. This included changing the weight tolerance level from a mobile device including fine tolerance calibration of the weight tolerance level. From here trying to see how I can make this acquisition device more viable by increasing practical functionality in it’s implementation or interfacing with a widely user Point Of Sale (POS) system, in this case H&L POS.
To complete this I needed to define the callback interrupt by my esp8266 subscribing to an MQTT topic of my own definition. My callback function needed to identify which topic my mobile device has published to and execute the corresponding code to that topic.
void setup() {
pinMode(LED_BUILTIN, OUTPUT); // Initialize the BUILTIN_LED pin as an output
Serial.begin(115200); // Set baud rate <-- was 9600 for Arduino Uno
setup_wifi(ssid, password);
client.setServer(mqtt_server, 5269);
client.setCallback(callback);
client.subscribe("changeTolerancePercent");
client.subscribe("calibrateTol");
client.subscribe("scaleReset");
scale = initScale(scale, LOADCELL_DOUT_PIN, LOADCELL_SCK_PIN);
GlobalTimer.setInterval(2000, timeOutOne);
}
void callback(char* topic, byte* payload, unsigned int length) {
  if(strcmp(topic,"changeTolerancePercent") == 0){
    Serial.println("tolerance arrived!! Look at changing the variable");
    tolPercent = byteToLong(payload, length);
    Serial.print("tolPercent set to: ");
    Serial.println(tolPercent);
  } else if (strcmp(topic, "calibrateTol") == 0){
    Serial.println("calibrate tolerance arrived!");
    tolPercent += byteToLong(payload, length);
    Serial.println(tolPercent);
  } else if(strcmp(topic, "scaleReset") == 0){
    Serial.print("Reset the scale!");
    scale.tare();
  } else {
    Serial.print("Message arrived [");
    Serial.print(topic);
    Serial.print("] ");
    for (int i = 0; i < length; i++) {
      Serial.print((char)payload[i]);
    }
    Serial.println();
    }
    // Switch on the LED if an 1 was received as first character
    if ((char)payload[0] == '1') {
      digitalWrite(LED_BUILTIN, LOW);   // Turn the LED on (Note that LOW is the voltage level
      // but actually the LED is on; this is because
      // it is active low on the ESP-01)
    } else {
      digitalWrite(LED_BUILTIN, HIGH);  // Turn the LED off by making the voltage HIGH
    }

}
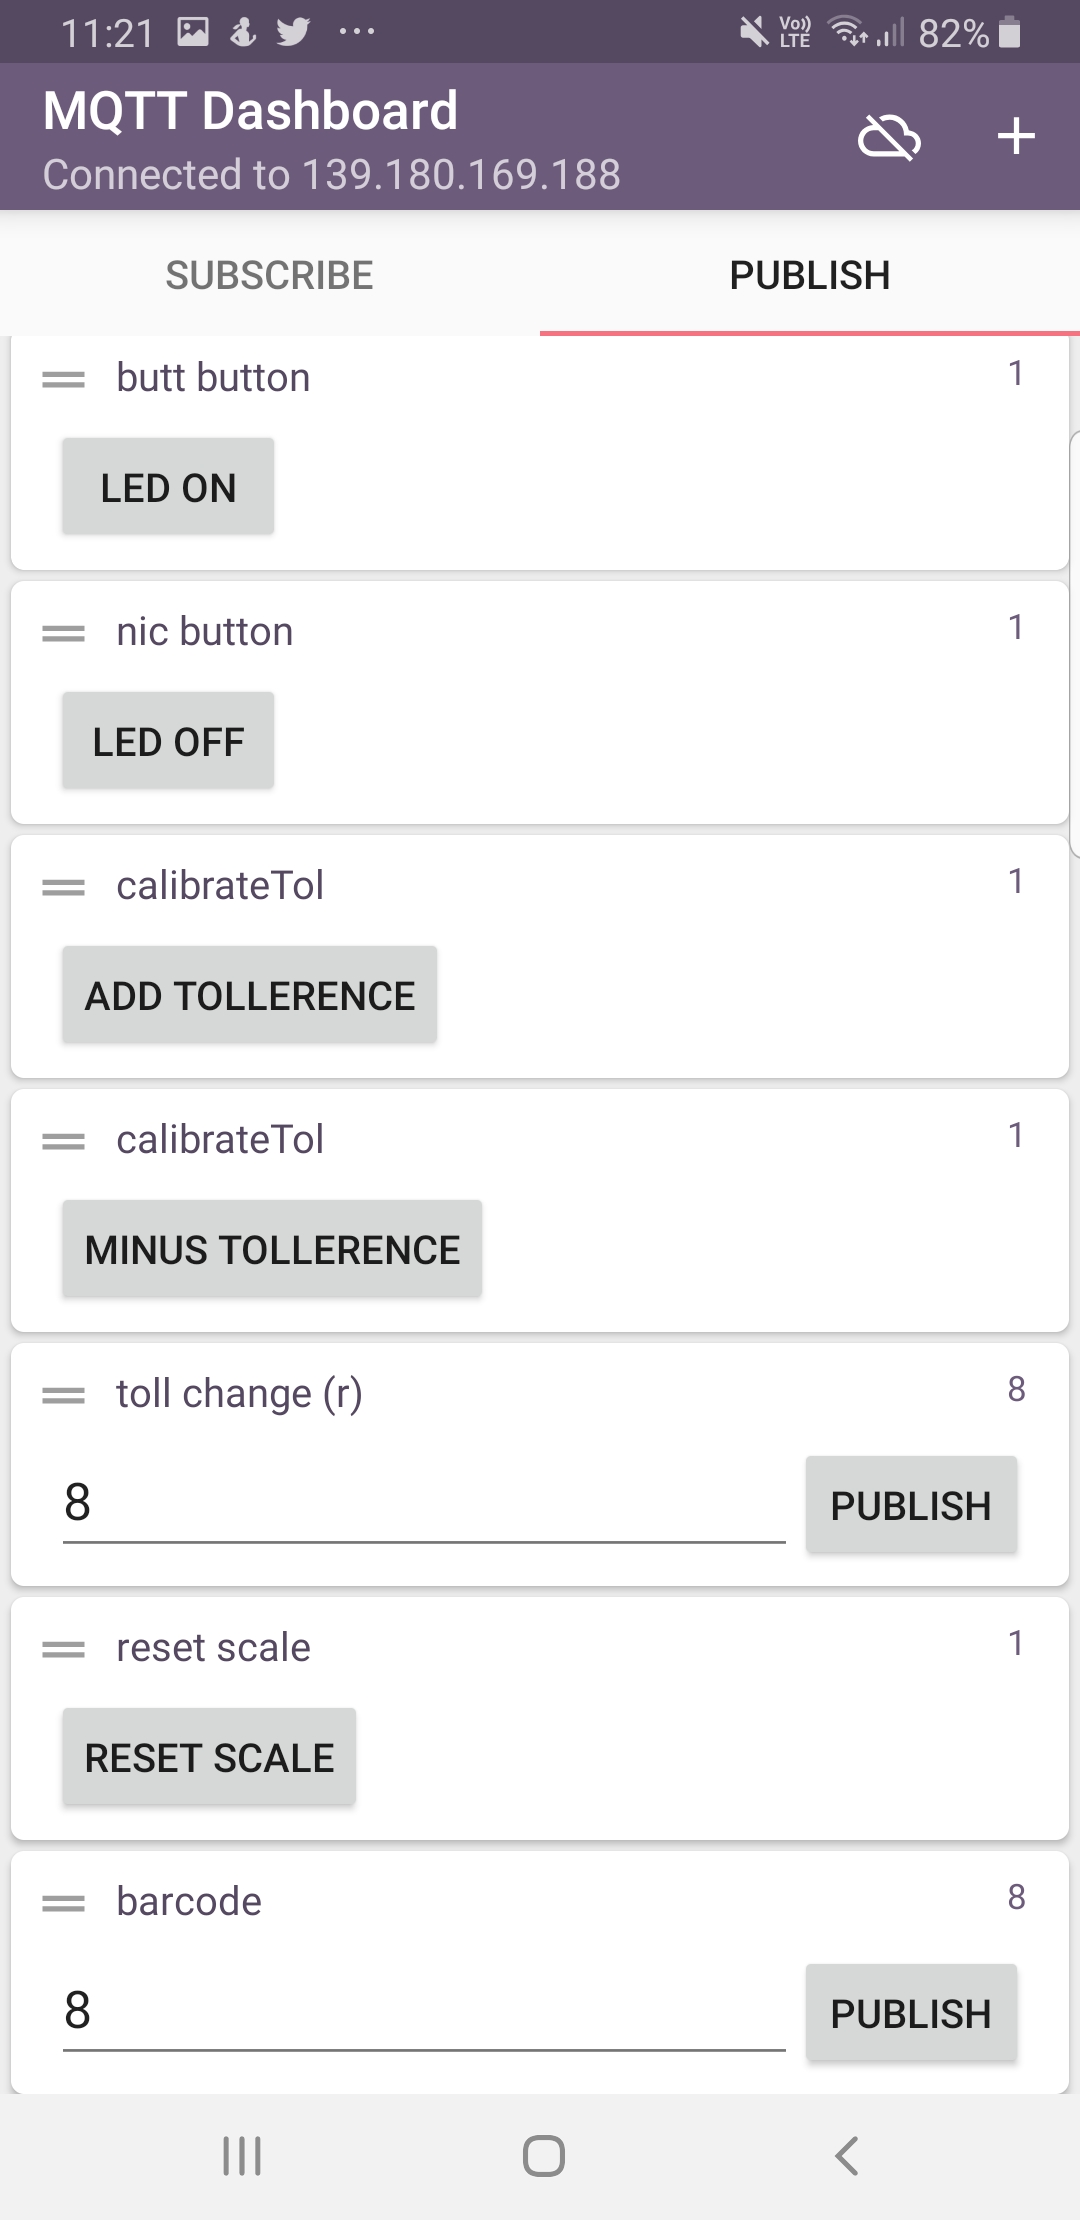
I defined my topics and was able to identify which topic I had published to from my mobile device through the MQTT Dashboard Android App.
Mobile MQTT Interface
Variable type Issues
| The problem I had was that my mobile device was publishing to the acquisition device as a character data type. |
Setting Mobile Publish
Hover Box Element
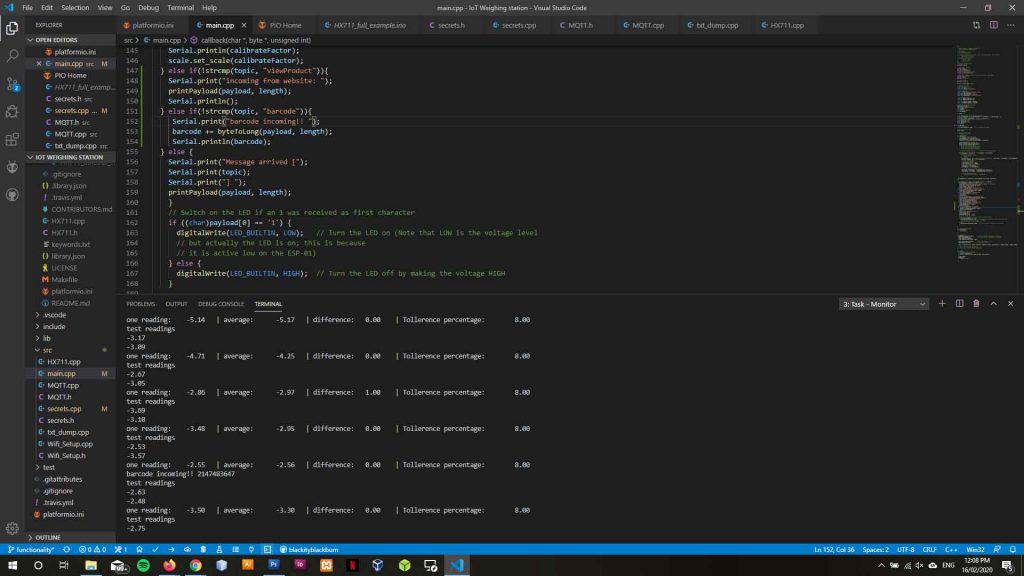
| The setting and calibration of my device required a data type such as a ‘double’ to perform calculations. I had n’t realised the error in my conversion until it was brought to my attention to translate the numbers via an ascii table as they were entering the device as unsigned integers.
I could not change the variable type sent meaning this calculation was needing to be carried out on my device. |
long byteToLong(byte* payload, unsigned int length){

    char bufTwo[length];

      // Copy payload into a buffer
      for (int j = 0; j < length; j++){
        bufTwo[j] = (char)payload[j];
      }

      return atoi(bufTwo);
  }
I needed to write a converter that would take the ascii character number and convert it to a decimal number and cast to a double for use in the program.
From here I could use the independant conversion function for different applications that deal with the subscription payload.
This setting of the tolerance level combined with the tolerance percentage filter made sure I refined the data I was putting into the database.
Publishing from Mobile
Publishing from mobile
| By publishing to a topic from the ESP8266 I can subscribe to that same topic on my mobile device and output the weight difference on my mobile device. |
void getWeight(){
// Get weight and calc difference
currentWeight = scale.get_units();
currentAvgWeight = scale.get_units(10);
difference = calcDifference(currentWeight, prevWeight);
unsigned long now = millis(); // Get the time in milliseconds
if(currentWeight < lowTollBound || currentWeight > upTollBound){
// Publish data to mqtt
if (now - lastMsg > 2000) {
lastMsg = now;
++value;
snprintf (msg, 50, "%s\n%.1lf\n%.1lf\n%.1lf\n%.1lf\n%.1lf", sensor_Name, currentWeight, currentAvgWeight, prevWeight, prevAvgWeight, difference);
snprintf (diffMsg, 50, "%.1lf", difference);
// Serial.print("weight ");
// Serial.println(msg);
client.publish("weight", msg);
client.publish("diff", diffMsg);
// Store the weight data collected
prevWeight = currentWeight;
prevAvgWeight = currentAvgWeight;
// Find the weight tollerence boundaries
upTollBound = prevWeight + ((prevWeight/100)*tolPercent);
lowTollBound = prevWeight - ((prevWeight/100)*tolPercent);
// print boundaries for test
printBoundaries(upTollBound, lowTollBound);
}
}
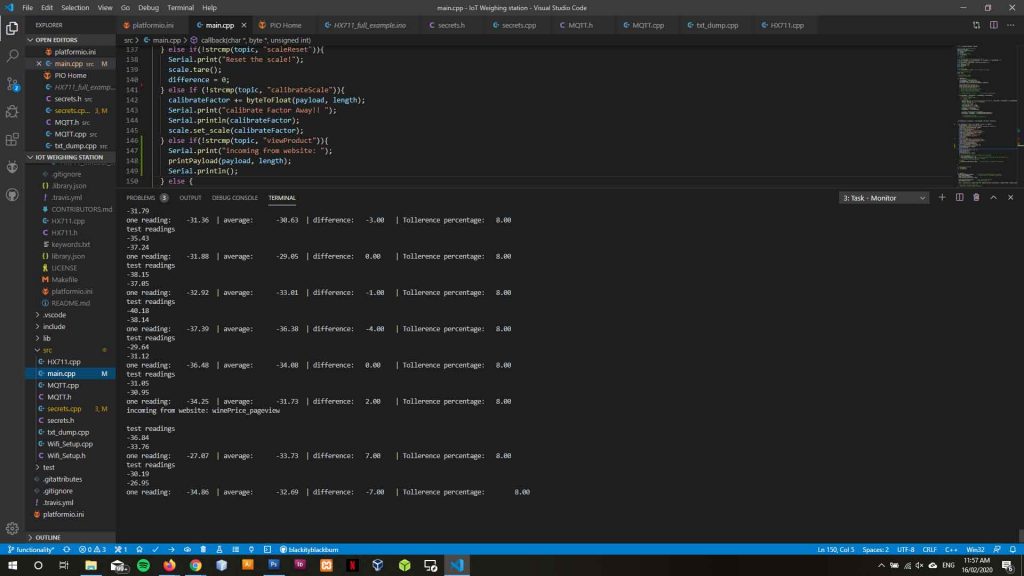
printReadings(currentWeight, currentAvgWeight, difference, tolPercent);
}
This shows I can measure / displaya weight & calibrate the tolerance level for which I want to store data from my mobile device.
From here there are other avenues I may like to pursue such as:
- Contacting a POS company to see how I can interact with a database to get product names and prices to begin to charge.
- Build a barcode scanner / build the means of detecting the product that is tracking the weights.
- Start identifying how the calculated price will interact with the POS automatically charging a drink to a table.
With next week’s sprint focusing on packaging, I needed to continue this week’s sprint with installing a new load cell that would fit the project user requirements. The user requirements dictate the load cell being attached to the bottle and remain attached while the user pours the liquid out of the bottle. For this to be fulfilled a thinner load cell is required for minimal interjection between the pourer and the bottle being poured from. The scale requires calibration in code for the user.
For calibration the HX711 library has the following function called in the initialization of the scale in the programs setup:
scale.set_scale(calibrateFactor);        // 2280.f, init value --> scale.set_scale(2280.f);___this value is obtained by calibrating the scale with known weights; see the README for details
  scale.tare();        // reset the scale to 0
In a similar fashion to the ‘tolerance set’ functionality above I have added to the callback function and calibration input from a mobile device as below:
 void callback(char* topic, byte* payload, unsigned int length) {
  if(!strcmp(topic,"changeTolerancePercent")){
    Serial.println("tolerance arrived!! Look at changing the variable");
    tolPercent = byteToLong(payload, length);
    Serial.print("tolPercent set to: ");
    Serial.println(tolPercent);
  } else if (!strcmp(topic, "calibrateTol")){
    Serial.println("calibrate tolerance arrived!");
    tolPercent += byteToLong(payload, length);
    Serial.println(tolPercent);
  } else if(!strcmp(topic, "scaleReset")){
    Serial.print("Reset the scale!");
    scale.tare();
    difference = 0;
  } else if (!strcmp(topic, "calibrateScale")){
    calibrateFactor += byteToFloat(payload, length);
    Serial.print("calibrate Factor Away!! ");
    Serial.println(calibrateFactor);
    scale.set_scale(calibrateFactor);
  } else {
    Serial.print("Message arrived [");
    Serial.print(topic);
    Serial.print("] ");
    printPayload(payload, length);
    }
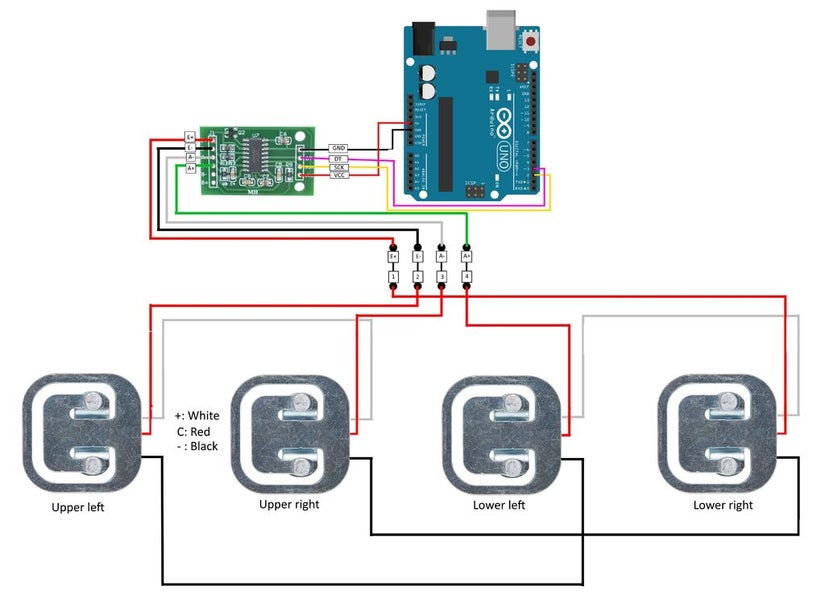
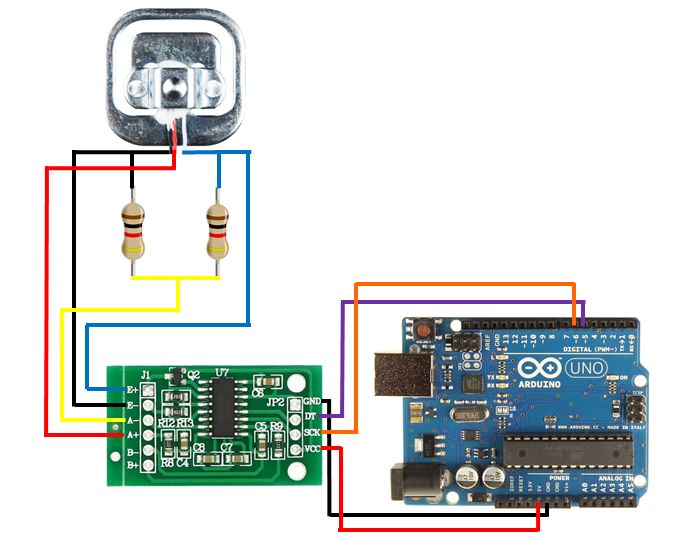
Installation of a new load cell from a single bar to a flatter multi node strain gauge such as the ones used in bathroom body scales required a change in baud rate and wiring depicted.
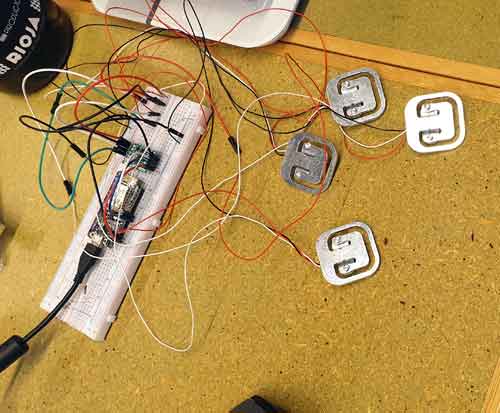
To make the housing for the device as small as possible, I wanted to use only 3 nodes for the strain gauge. I attempted several means of wiring with no readings coming from the scale. For this reason I decided a more conventional 4 node strain gauge would suit given the time constraints to achieve my goal.
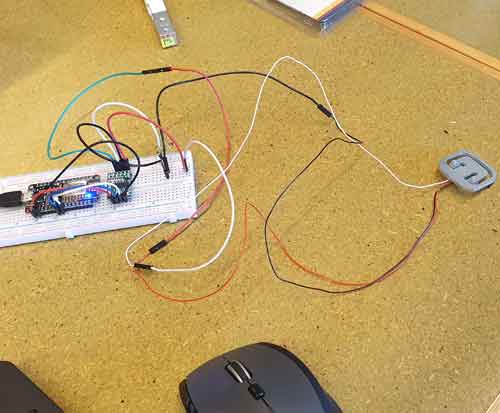
I had trouble with calibrating and obtaining readings from my 4 cell strain gauge and wired up a single flatter cell gauge but ultimately decided the 4 cell strain gauge was the way forward and not add too much more to the device housing.
Data was coming in randomly which means I require a median filter such as this to clear up data being read into the device.
I also required going through the HX711 documentation here for more information on the calibration of the scale.
The new wiring for my load cell required a split load and a couple of resistors. As you can see in our diagrams below my new wiring has a few new components but is now more compact to fit in a tight technical package housing.
Now that I have considered some of the broader issues relating to my packaging and functionality I wanted to look at integration to a point of sale. I decided I would emulate a POS system rather than contact H&L at this early stage of development.
To emulate a POS system I needed the following elements:
- A means of identifying the product against an “in-house database” which would in reality be attached to a POS system.
- A way to find and pull that data to my acquisition device from the database and calculate the amount missing from the bottle.
- A way to send the calculated data back to the POS system.
From here the POS system will manage the payment, stocktake and stock control
The database will include product data such as:
- Product number (unique identifier or UID)
- Product Producer
- Product Name (or identifier if a producer has different grades of product)
- Country
- Region
- Sub-region
- Varietal
- Price
As the product has a UID in the database I can tag each bottle easily using QR codes or Barcodes. By knowing which UID is associated with the brand or bottle I can generate a QR / barcode for specific use with my system, print that code out as a sticker and stick it to the bottle. When attaching my device to a bottle, the user would scan the code with their mobile device and send that UID to the acquisition device. The acquisition device would keep hta UID and reference that with the database to pull the pricing information and push the amount to be charged back to the POS with the UID. to process payment to the customer.
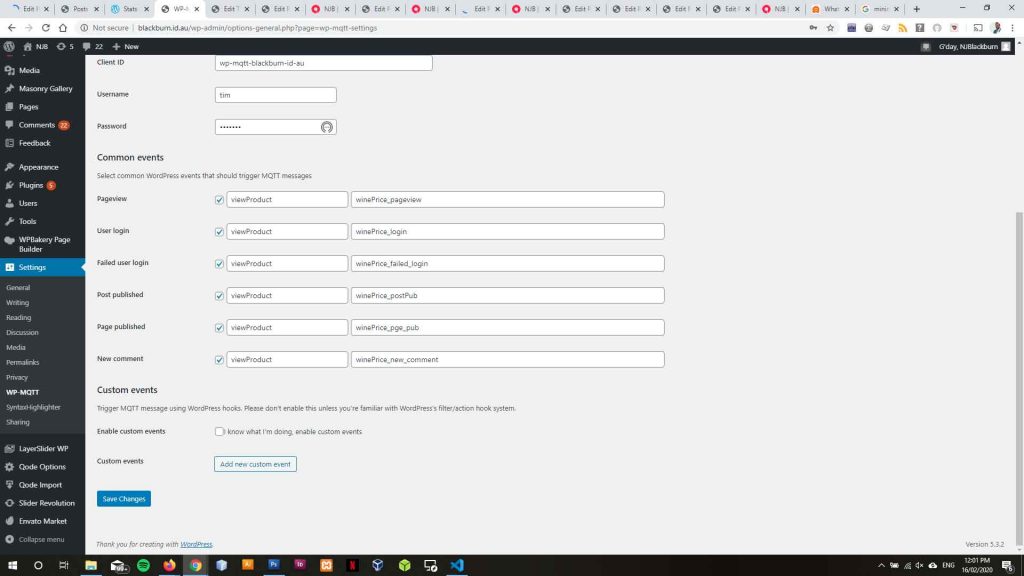
Originally I wanted to build a POS on this site to emulate the transition of data and successfully used MQTT to send data from this site to my acquisition device and stated building a table to send requests to. I had some time constraints which hampered my efforts but none the less explored the possibility and given more time could integrate this better.

Integrating QR scanning into my website is possible via the following links:
https://www.bytebang.at/Blog/Use+your+smartphone+as+IoT+enabled+QR+Scanner
https://rawgit.com/bytebang/qr2mqtt/master/scanner.html
This would keep my use independent from 3rd party apps
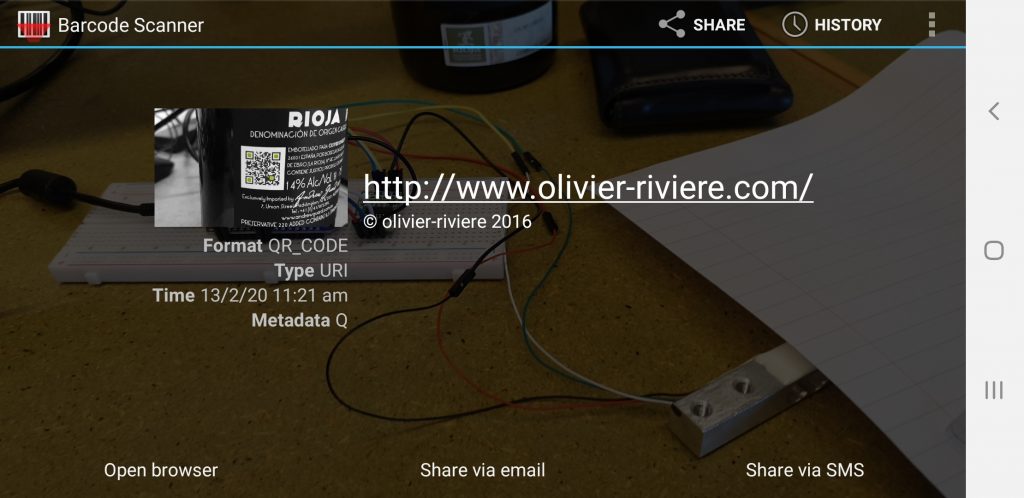
Software wise I was able to find an android barcode and qr scanner which pulled my unique ID from my unique qr / barcode below.
QR / barcode identification:
https://play.google.com/store/apps/details?id=com.google.zxing.client.android&hl=en_AU
From here the UID can be copied to the clipboard on my mobile device and paste into my MQTT application and sent to the device.

As integrating push and pull requests into this website was going to fall outside my time constraints the next step, and one that would be alot better, is to:
- Import a dummy product database into InfluxDB and
- Request pricing information from that dummy database and
- Make a database for charging data to a database representing my POS.
- Pull the amount of charged data from InfluxDB to grafana or chronograf
- Embed that result into this site for display.This would represent what would be charged to a customer.
As our sprint next week involves packaging our acquisition device I will undertake:
- Following a process of analysis of alcohol packaging to attach my device.
- Build a 3D model in Rhino#d or Solidworks
- 3d print that model and install my technical package into that model.
This may require another chip housing teh NodeMCU but we will find that out next week.